

In a world where information is at our fingertips, staying informed about the weather and accessing local services has never been easier. With the iOS apps Clime: NOAA Weather Radar Live and Angi: Find Local Services, you can conveniently navigate through weather forecasts and locate essential services. In this article, we’ll guide you through the installation and use of these two valuable iOS apps.
Installing Clime: NOAA Weather Radar Live

- Open the App Store: On your iOS device, locate and open the App Store. This is where you’ll find and install Clime.
- Search for Clime: In the App Store’s search bar, type “Clime: NOAA Weather Radar Live” and press “Search.”
- Install the App: Once you see the Clime app in the search results, tap on it. Then, tap the “Install” button to download and install the app on your device.
- Open Clime: After the installation, tap “Open” to launch Clime.
Using Clime: NOAA Weather Radar Live
Clime offers real-time weather information, including radar maps and forecasts. Here’s how to use it effectively:
- Location Services: Ensure that your device’s location services are enabled for Clime to provide accurate weather updates for your area.
- Navigation: Use the app’s intuitive interface to navigate various weather features. You can access radar maps, hourly and 7-day forecasts, and severe weather alerts.
- Customization: Tailor Clime to your preferences by setting up locations to quickly access weather information for multiple areas.
- Notifications: Enable push notifications to receive weather alerts and updates for your selected locations.
- Stay Informed: Check the radar maps for real-time weather conditions, and use the forecasts to plan your day or week accordingly.
Installing Angi: Find Local Services
- App Store Access: Open the App Store on your iOS device.
- Search for Angi: In the App Store’s search bar, type “Angi: Find Local Services” and press “Search.”
- Install the App: Once you find the Angi app in the search results, tap on it. Then, tap the “Install” button to download and install the app on your device.
- Open Angi: After installation, tap “Open” to launch Angi.
Using Angi: Find Local Services

Angi is a valuable tool for finding local services, from home improvement to medical professionals. Here’s how to make the most of it:
- Sign In/Register: You can create an account or sign in using your existing credentials to access Angi’s full suite of features.
- Search for Services: Use the search bar to find specific services in your area, such as plumbers, electricians, or contractors.
- Read Reviews: Browse service provider profiles, read customer reviews, and view ratings to make informed decisions.
- Contact Providers: Easily get in touch with service providers through the app to request quotes or schedule appointments.
- Save Favorites: Save your preferred service providers to your favorites list for future reference.
By following these simple steps, you can install and utilize the Clime and Angi apps on your iOS device to stay informed about the weather and easily access local services, enhancing your daily life with valuable information and convenient solutions.
Installing and Using the AttaPoll App:
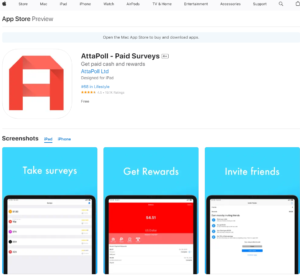 Step 1: Installation
- Go to Your App Store: Depending on your device, open the Google Play Store for Android or the Apple App Store for iOS.
- Search for AttaPoll: In the search bar, type “AttaPoll” and press Enter.
- Install the App: Find the AttaPoll app in the search results and click the “Install” or “Download” button. Wait for the installation to complete.
Step 2: Registration and Setup
- Open the App: Once the app is installed, open it by tapping on its icon.
- Register or Log In: If you’re a new user, you’ll need to register for an account. Existing users can log in using their credentials.
- Complete Your Profile: Follow the on-screen prompts to complete your profile. This might include providing some personal information and interests.
Step 3: Using AttaPoll
- Take Surveys: The main purpose of AttaPoll is to earn rewards by taking surveys. When available, you’ll see surveys listed in the app. Click on a survey, answer the questions, and earn points.
- Check Your Balance: You can track your earned points in the app. These points can often be redeemed for gift cards or PayPal cash.
- Cash Out: Once you’ve accumulated enough points, you can cash out your earnings.
Installing and Using the SureVPN App:
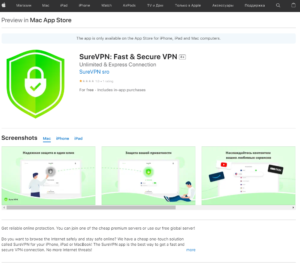
Step 1: Installation
- Go to Your App Store: Open the Google Play Store for Android or the Apple App Store for iOS.
- Search for SureVPN: In the search bar, type “SureVPN” and press Enter.
- Install the App: Find the SureVPN app in the search results and click the “Install” or “Download” button. Wait for the installation to complete.
Step 2: Setting Up SureVPN
- Open the App: After installation, open the SureVPN app by tapping on its icon.
- Create an Account or Log In: Depending on the app’s setup, you may need to create an account with SureVPN. Some VPNs offer a free trial period.
- Connect to a Server: To use the VPN service, you’ll need to connect to a server. Usually, there’s a “Connect” button in the app. Click it, and the VPN will connect you to a secure server.
- Choose Your Server Location: You may have the option to choose a server location. Select one based on your needs. For example, you can choose a server in a different country to access region-restricted content.
- Adjust Settings (Optional): You can often customize settings like the protocol used, automatic connection, and more based on your preferences.
- Disconnect: When you’re done using the VPN, you can disconnect from the secure server by clicking the “Disconnect” button in the app.
- Quit the App (Optional): Some VPNs may continue running in the background, so you can quit the app if you’re not using it to conserve battery life.